Fresh Starts, and an Aebelskivver Recipe

img_3387

It’s a new year! I can hardly believe the difference I feel in its arrival. There is some magic behind those numbers, I don’t care how illogical this sounds; I already know this year will be different. And like all fresh starts, we’ve been making complete breakfasts (oh my goodness! As in, not cereal from a box!) during our mellow holiday, and let me tell you: this makes all the difference in the world. I will be awakening earlier once school starts again *just* so we can enjoy sitting down together to eat our breakfast. What a concept!

Check out how YELLOW our hen’s eggs are! Here’s the difference between store-bought eggs and home-grown:

img_33711

This morning we made aebelskivvers. You know, the treat-filled Scandinavian pancake that requires that special pan with the little holes? These have become Chas’ favorite breakfast item, along with bacon. If he could have his way, he would get pancakes or waffles alongside (more accurately, underneath) his aebelskivvers, but this mama has only *so* much energy behind one cup of coffee. Not to mention the redundancy? And the sugar highs? Oh my!

img_3373

This recipe is the best I’ve come up with, after some experimenting:

Basic Ebelskivver Batter

4 eggs, whipped up nice and bubbly

1/2 cup water

1/2 cup milk

1 cup all-purpose flour

1/2 tsp salt

2 tsp baking powder

1 T melted butter, for oiling the pan

Preheat the pan, mix up the wet and dry ingredients separately, then fold together gently until all floury gobs are gone. Let sit for five minutes (as the pan raises to a medium-high heat). Baste the pan holes with butter, then fill each hole in the pan 2/3 full with the batter. Next, top each dollop with a morsel of something yummy (our favorite? Nutella!) and then cover the morsel with enough batter to completely fill the hole.

img_3381

When each pancake turns slightly drier around the sides, you will know to turn them over. Taking two chopsticks, use one to push the tip of each pancake down into the hole while using the other chopstick to assist the opposite end of the pancake up and over to complete the flip. In a matter of a few minutes, they will be done (the bottom–as well as the top–should look golden).

img_3386img_3384 img_3391-2 img_3393

So I got a lot of work done today! It really pays to start the day off right with a good breakfast. Well, I actually had cream of wheat and orange juice but you get the point. I moved EARTH! (Well, a lot of earth for this little lady)

IMG_3414-3

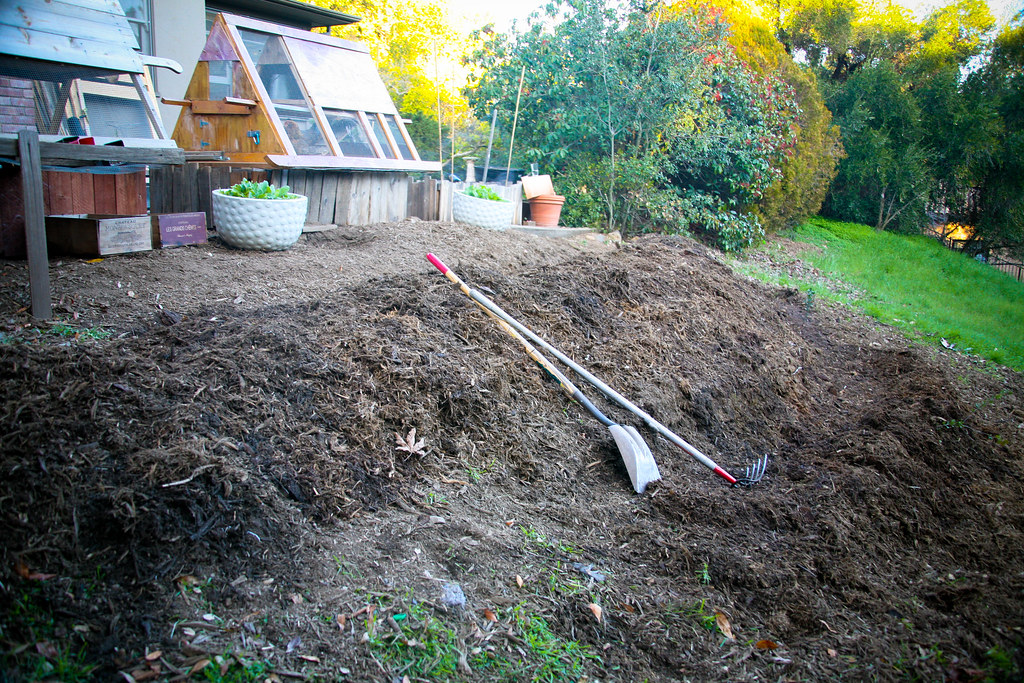
We have this sloping, southwest-facing backyard, well-suited for gardening. When they cut the Monterey Pine tree (the tire swing tree) down last year, the hill became filled with the mulch from the tree. I built raised beds at the top of the hill last spring (now topped with the chicken tractors!), but as with all projects I begin I had to take the entire garden build and break it down into steps, season-by-season. Well, it’s time for a new terrace, so that’s what I continued working on.

IMG_3415-3

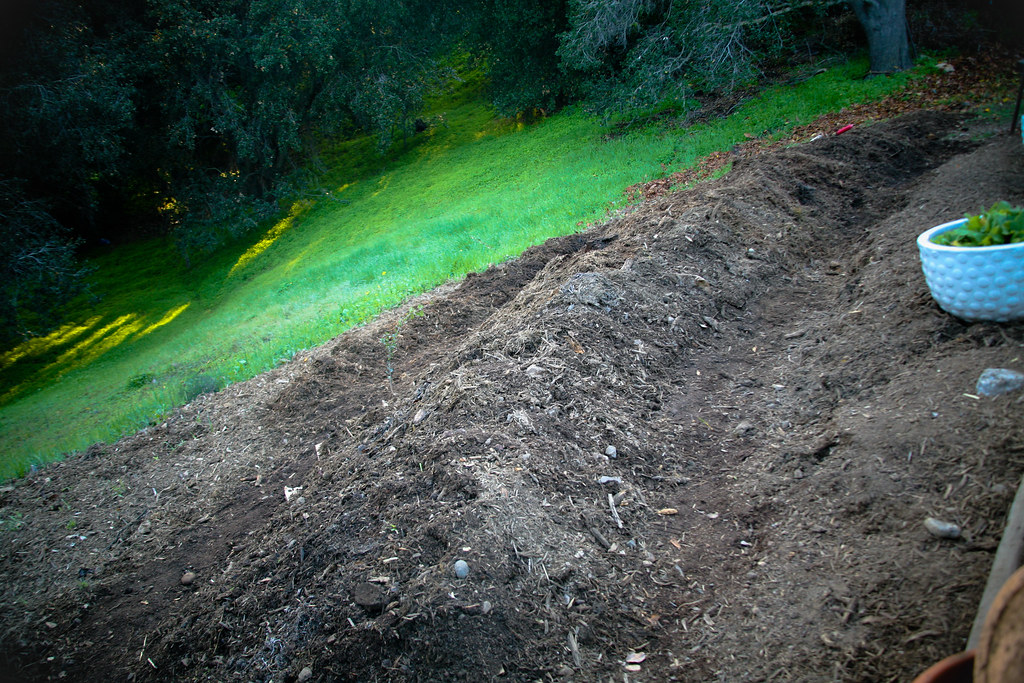
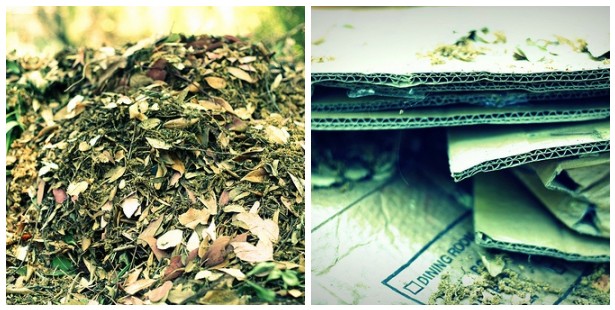
By sheet mulching (lasagna gardening) I added first a layer of chicken manure, then a layer of newspapers, then a layer of leaves, then cardboard sheets from broken-down boxes, and finally another 3-4 inches of bark mulch atop that. I’m sore already. It felt so completely wonderful being outside in the warm sun today. The boys later would come out and join me for a little conversation while I worked, but I was mostly alone with the cats and Seti, who would occasionally help me dig.

And then there were the chickens and the leftover aebelskivvers!

IMG_3416-3

I hope you enjoy the recipe as much as all of us!

Sheet Mulching

You are looking at a gardener’s gold mine; a stockpile of fallen leaves and recycled cardboard boxes, all flattened down and ready for work. I’m building more garden beds right now without building the heavy-duty raised beds; this time I’m creating a lasagna garden or a sheet mulched garden. It’s great because this doesn’t require anything I have to go out and buy and certainly doesn’t require of me any more back-breaking carpentry work (since I’ll be making another chicken tractor this weekend). Somebody please stop me with the chicken nonsense.

The whole idea behind the raised beds that I built earlier was to keep the gophers at bay, who have menaced me from the beginning in this garden, but it seems that Seti and the cats have gained the upperhand on the gophers.  Nearly every morning I see a kitten batting a gopher around on the patio, so I’ve determined that quite possibly the gophers are either on retreat or in fewer numbers now.
to be fair,

You can build some fast garden beds using the permaculture technique of sheet mulching to build up a simple, low-maintenance, no-dig garden bed, an instant garden of sorts. It gets you going immediately. And I need that. Sheet mulching suppresses weeds and grasses and dandelions and EVEN OXALIS. You can build sheet mulched beds atop any kind of soil, except for that concrete-looking, leached-out, rock-hard soil that I’ve got going out back. (In my case, I’m building up off the ground and carting in more earth and compost to fill it. The rest of the process is identical for everyone.)

Here’s how you do it:

Start with an area of 4 square meters, and build out as time and materials allow.

You’ll need:

    1.  a concentrated compost layer (this is for the worms): enriched compost, poultry or stock manure, worm castings or the like. For my first bed I simply removed the chicken tractor from where it was sitting and left all the manure in its place.
    2.  a weed barrier: 4-6 sheet layers of newspaper, cardboard, burlap bags, old carpet, worn-out jeans, whatever you can find along these lines. Place this atop the concentrated compost layer.
    3.  a compost layer: Well conditioned compost, grass clippings, seaweed and leaves are ideal materials to spread over the weed barrier. It must be weed free, and it should add up to about 3 inches tall, fairly compacted, atop the weed barrier.
    4.  a top layer: leaves, twigs and small branches, fern fronds, straw, wood chips, wood shavings, sawdust, bark, etc. 3-5 inches deep. These will inhibit moisture loss and slowly decompose over time, much like leaf litter on the forest floor.
    5. your plants! Now you can make some holes in the top layer and insert into those spaces some plants–but the trick is to plant them close together rather than too far apart.

Here’s a visual aid for the visual learners like myself from The Humanity Development Library:

And here’s a quick video by the father of Permaculture himself, Bill Mollison, as explains the mechanism of sheet mulching while planting a lazy gardener’s potato patch:

It really couldn’t get any easier to start another garden bed. The hard part is maintaining what you’ve planted while allowing your chickens to range. I’d like to see someone’s clever assortment of chickenproofing strategies in the garden. Until then, be prepared to see some jerry-rigged aviary netting and the like in my garden, because that’s how I roll.

Who else besides me is still trying to make room for more summer/ fall vegetables?

June’s Garden

June garden

Crossing out #2 on the list, this garden is now in full swing. Just about everything growing out there is pictured above, but  I can’t believe I haven’t included the zucchinis and squashes. Really. They’ve reached such an absurd level of abundance that, well, perhaps for me it’s enough just seeing them pile up in the kitchen.

I tend to appreciate what little I have as opposed to how much. For your consideration, the smattering of ripe ‘Stupice’ tomatoes and the variety of tomatoes yet to come:


raisedBeds-20

Alis has some tender shoots and blooms growing over at her dad’s house, just a few miles from where we live. Siri doesn’t mess around,  Denise has a beautiful greens assortment (of which I’m envious, ever since the chickens mowed all of ours (I’m learning what to keep covered)! Also, she may be on a plane to Melbourne right now, but I happen to know that Cyndi has been getting her hands dirty, too.

What’s growing in your garden right now?